Navigating the Project Tree View
Navigating the Project Tree View
After selecting the applicable baseline and project filter, the project tree view will display on the left hand side of the projects page.
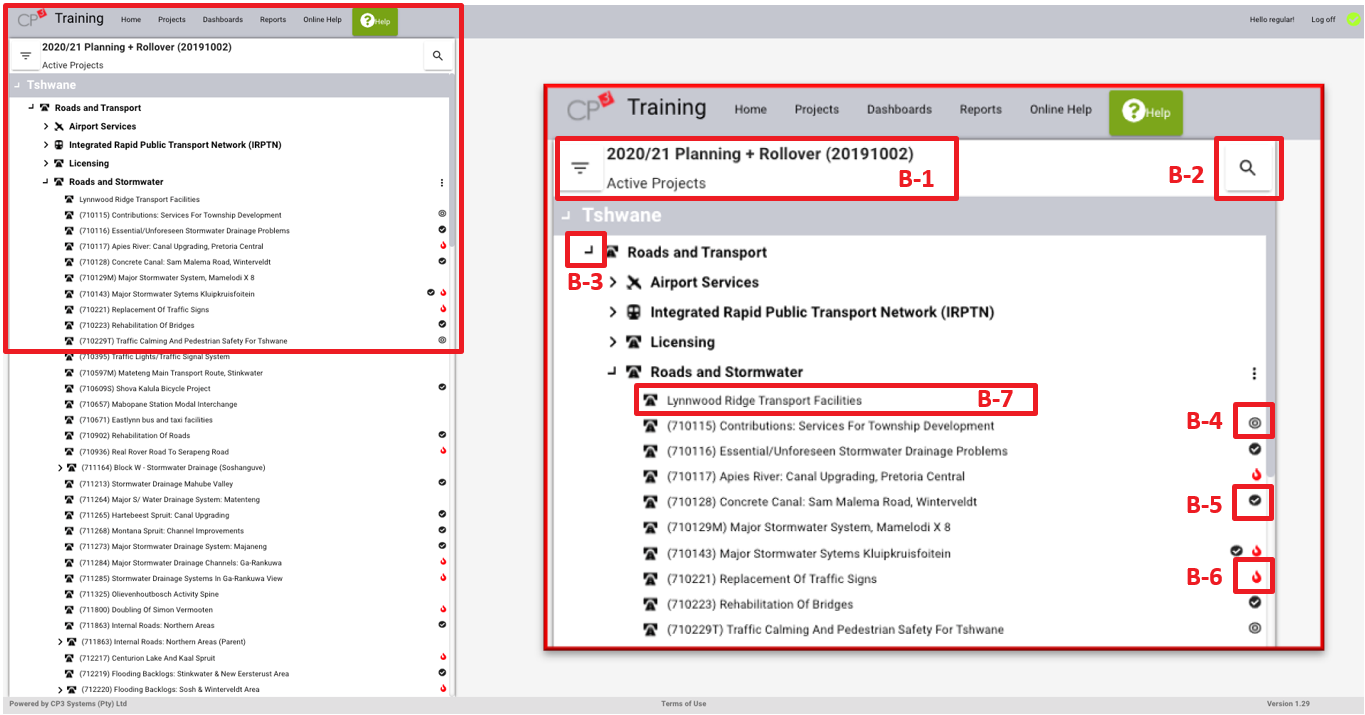
To navigate the project tree view, take note of the following functions:
- (B-1) To select a different baseline or project filters click on the baseline filter icon.
- (B-2) To search the project tree view for a specific project number or name click on the search
- (B-3) To expand the unit/department/parent project to a project level view, click on the expand button located next to the unit/department/parent project.
- (B-4) The committed icon located next to a project indicates that the project is marked as committed. A committed status indicates projects which formed part of an approved budget and include projects which are contractually committed as “assets under construction” or projects which completed the procurement process.
- (B-5) The provisioned-in icon located next to a project indicates that the project is marked as provisioned-in. A provisioned-in status indicates projects which formed part of an approved budget and include projects which are not contractually committed as “assets under construction” or projects which have not completed the procurement processes.
- (B-6) The exception list icon indicates information outstanding for a project and ranges from works/affected location to project scope and budget. Once a particular project meets the minimum requirements as outlined in the exception list, the exception list icon will not be displayed next to that particular project.
To view or edit information pertaining to a specific project, click on the project (B-7). Once the project is selected, the following window will display on the right hand side:
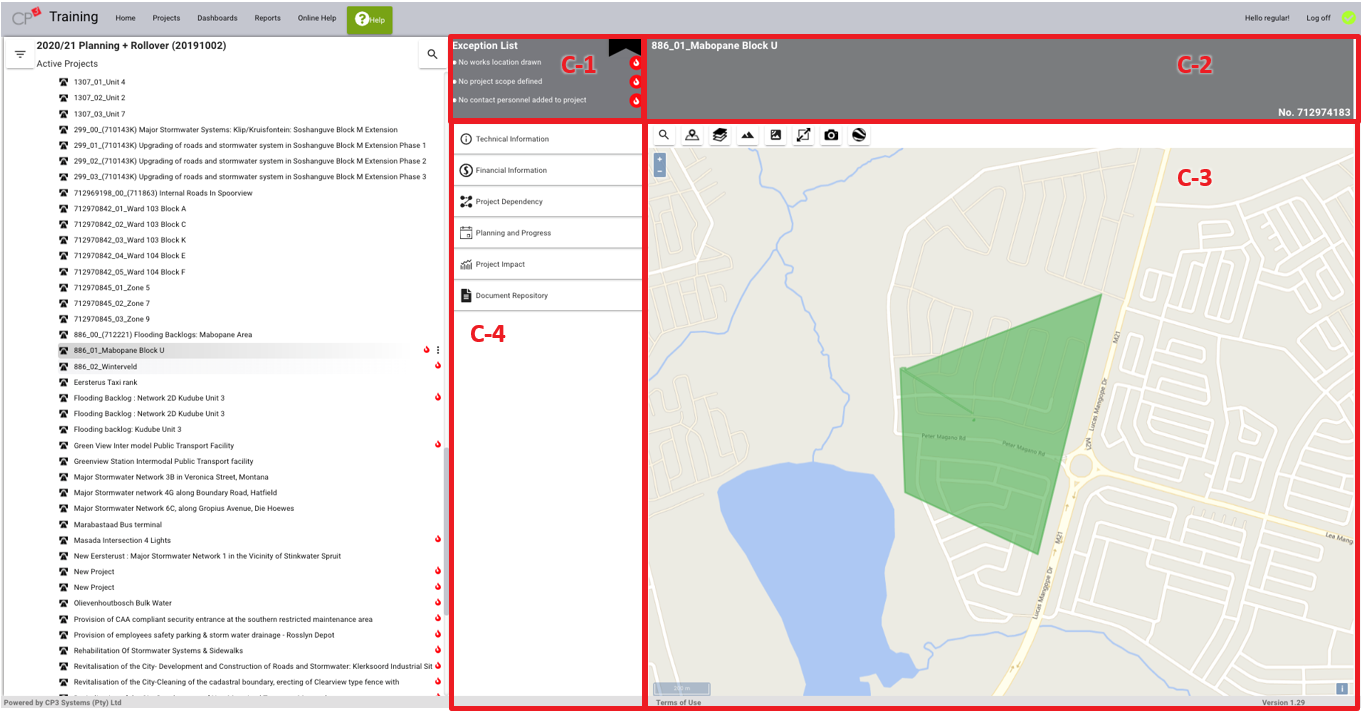
The project window consists of the following:
- (C-1) The exception list window which displays information outstanding for a specific project. Refer to the exception list icon outlined above.
- (C-2) The project name and CP3 ID.
- (C-3) The project mapping window. Refer to the training guideline for mapping a project works location and affected area.
- (C-4) The project information section, where technical information is captured pertaining to each project. Refer to Chapter 3; 4 and 5.